 RSS Feed
 Twitter
 08:58
08:58
 Unknown

ദഹനക്കേട് മാറാന് ഒറ്റമൂലികള്
സമയം തെറ്റി കഴിക്കുമ്പോള് ഉള്ള ദഹനക്കേട് മാറാന് ചില പ്രതിവിധികള് ഇതാ .
1. ഇഞ്ചി കഴുകി ചതച്ചു നീരെടുത്തു ഒരു ചെറിയ സ്പൂണ് വീതം അല്പാല്പമായി അലിയിച്ചിറക്കുക .ഇതു ദഹന രസങ്ങളെ ഉത്തജിപ്പിക്കും .
2. 15 ഗ്രാം ചുക്ക് കഴുകി ചടച്ചു ഒരു ഗ്ലാസ്സു വെള്ളത്തില് തിളപ്പിച്ചു ആറിക്കുക .ഇത് അല്പ്പല്പ്പമായി കഴിക്കുക .
3. 15 ഗ്രാം മുത്തങ്ങ കിഴങ്ങ് കഴുകി ചതച്ചു ഒരു ഗ്ലാസ് വെള്ളത്തില് തിളപ്പിച്ചു ആറിച്ചു അല്പാല്പമായി കഴിക്കുക .
4 .ഗ്യാസ് നിറഞ്ഞുള്ള പ്രയാസങ്ങള് ആണെങ്കില് ല് ഒരു കഷണം പാല്കായം അരഗ്ലാസ്സ് വെള്ളത്തില് തിളപ്പിച്ച് ആറിച്ചു ചെറിയ അളവുകള് ആയി കഴിക്കുക.
5. ദഹനക്കേട് മൂലം ഛര്ദി ഉണ്ടായാല് മലര് ഇട്ടു തിളപ്പിച്ച വെള്ളം കുടിക്കുക.വെറുതെ മലര് നുണഞ്ഞു ഇറക്കാന് സാധിച്ചാലും ഫലം കിട്ടും .
6. മലര് ഇട്ടു തിളപ്പിച്ച വെള്ളത്തില് അല്പം ഇഞ്ചി ചേര്ത്ത് കഴിക്കുന്നത് ഛര്ദി ശമിക്കാന് നല്ലതാണ് .
7. 20 ഗ്രാം ചിറ്റമൃത് കഴുകി ചതച്ചു 200 മില്ലിലീറ്റര് വെള്ളത്തില് തിളപ്പിക്കുക .അരിച്ച് തണുത്ത ശേഷം തേന് ചേര്ത്ത് അലിയിച്ചിറക്കുക
പല കാരണങ്ങള് കൊണ്ട് ദഹനക്കേട് നീണ്ടു നിന്നാല് വൈദ്യ സഹായം തേടേണ്ടതാണ്
Like ·
Yoga
for gas trouble
Yoga is very helpful for gas trouble as it helps to expel the gas by stimulating peristalsis and increasing blood flow to the digestive organs so that they can work more effectively. Gas trouble problems tend to occur when the food in the stomach is not digested properly resulting in stomach upsets, indigestion, nausea and heartburn, which can all be controlled by using yoga.
Many a times one may also suffer from gas trouble after consuming rich, fatty and heavy foods. In order to avoid recurrent gas trouble on account of indigestion, one should follow a diet that is rich in fiber and low in fat along with plenty of grains, fruits, fresh vegetables and whole pulses plenty of fresh drinking water so as to provide the stomach with some relief ,have frequent and small meals and light foods. Do not go off to sleep immediately after dinner. Go for walks in the night so that the food is digested well. In case of a problem, Have a banana as it is bland and can relieve from pain. Ingest few fennel seeds after the meals. Do this also along with yoga. Yoga for gas trouble is known to be highly effective especially yoga in case of indigestion resulting in gas and digestive problems Try these pose to relieve your gas problems.
Basic Rules for Practicing Yoga
The best time to practice yoga is morning as it makes a person free for the whole day from the tension of taking time out for doing yoga. If doing yoga in morning is not possible for someone then he must choose a particular time and stick to that time every day. It is advisable to practice yoga on a regular basis because irregularity will not bring the proper result. There is no need to practice yoga twice in a day but at least 15 to 20 minutes in a day should be allotted for doing this at the beginning and then gradually increase it to 1 hour. Try and find a clean, airy, calm and noiseless corner at home, play some soothing yoga music and make the atmosphere perfect for doing the sadhana. A work like doing yoga must be done silently. So, talking or conversing with other person at that time is better to avoid.
Though there is no restriction on normal food habit but the meal-timing is an important factor in yoga practicing. Doing yoga with full stomach is strictly disapproved by the yoga gurus. One can take a light meal an hour before doing yoga. It is always advisable to maintain a proper diet and stay away from any kind of spicy food, fast food, coffee, alcohol or drugs. Try to keep the mind fresh and tension-free at the time of doing yoga otherwise it may hamper the concentration level. Generally during illness one should stop yoga practicing and for women, it should be stopped during their menstruation periods
Yoga poses to reduce Gas Formation
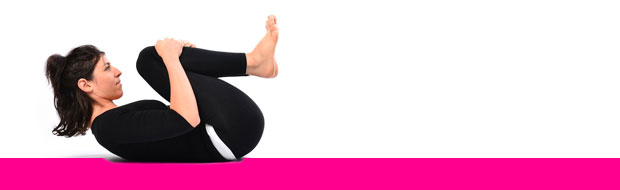
A. Pawanmuktasana (Wind relieving pose)
How to do Wind-Relieving Pose (Pavanamuktasana)
- Lie on your back with your feet together and arms beside your body.
- Breathe in and as you exhale, bring your right knee towards your chest and press the thigh on your abdomen with clasped hands.
- Breathe in again and as you exhale, lift your head and chest off the floor and touch your chin to your right knee.
- Hold it there, as you take deep, long breaths in and out. Checkpoint: As you exhale, tighten the grip of the hands on the knee and increase the pressure on the chest. As you inhale, loosen the grip.
- As you exhale, come back to the ground and relax. Repeat this pose with the left leg and then with both the legs together.
- You may rock up and down or roll from side to side 3-5 times and then relax.
Benefits of Wind-Relieving Pose (Pavanamuktasana)
- Strengthens the back and abdominal muscles
- Tones the leg and arm muscles
- Massages the intestines and other organs in the abdomen
- Helps in digestion and release of gas
- Enhances blood circulation in the hip joints and eases tension in the lower back
Contraindications
Avoid practicing Wind-Relieving Pose (Pavanamuktasana) if you are facing the following health issues: heart problem, hyperacidity, hernia, slips disc, testicle disorder, menstruation, and after the second trimester of pregnancy.

B. Matsyasana (Fish pose)
How to do Fish Pose (Matsyasana)
- Lie on your back. Your feet are together and hands relaxed alongside the body.
- Place the hands underneath the hips, palms facing down. Bring the elbows closer toward each other.
- Breathing in, lift the head and chest up.
- Keeping the chest elevated, lower the head backward and touch the top of the head to the floor.
- With the head lightly touching the floor, press the elbows firmly into the ground, placing the weight on the elbow and not on the head. Lift your chest up from in-between the shoulder blades. Press the thighs and legs to the floor.
- Hold the pose for as long as you comfortably can, taking gentle long breaths in and out. Relax in the posture with every exhalation.
- Now lift the head up, lowering the chest and head to the floor. Bring the hands back along the sides of the body. Relax.
Benefits of Fish Pose (Matsyasana)
- Stretches the chest and neck
- Helps relieve tension in the neck and shoulders
- Provides relief from respiratory disorders by encouraging deep breathing
- Tones the parathyroid, pituitary and pineal glands
Contraindications of Fish Pose (Matsyasana)
Those who have had serious lower-back or neck injuries are strongly recommended not to practice this pose.
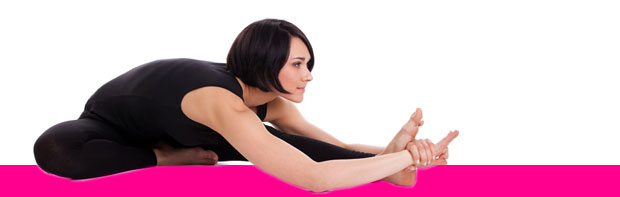
C. Janu Sirshasana (Forehead to single knee pose)
How to do Janu Shirasasana
- Sit up with the legs stretched out straight in front of you, keeping the spine erect.
- Bend the left knee and place the left foot against the right thigh, keeping the left knee on the floor.
- Breathing in, raise both arms above your head and stretch up, and twist a little to the right from the waist.
- Breathing out, bend forward from the hip joints keeping the spine straight, directing your chin to the toes.
- If you can, hold on to your big toes and, pointing your elbows to the ground, move forward as you pull on your toes.
- Hold. Keep breathing.
- Breathing in, come up and breathing out, bring the arms down to the sides.
- Repeat on the other side.
Benefits:
- Stretches lower back
- Massages the abdominal organs and tones the shoulders
- Help in gas trouble
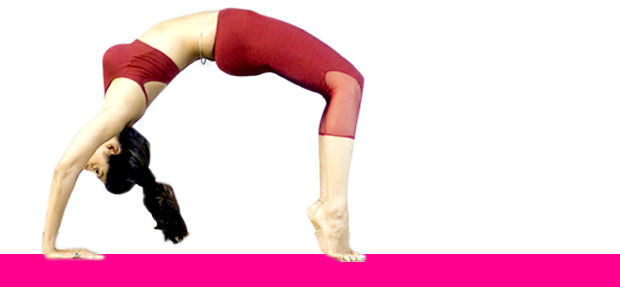
D. Chakrasana (Wheel pose)
How to do Lying-down Body Twist (Chakrasana)
- Lie on your back with arms horizontally stretched out in line with the shoulders.
- Bend your knees and bring your feet close to your hips. The soles of the feet are fully on the ground.
- Swing the knees to the left until the left knee touches the ground (the right knee and thigh are resting on the left knee and thigh). Simultaneously, turn the head to the right and look at your right palm.
Checkpoint: Shoulder blades must touch the ground. While the body is twisted, there is a tendency for one of the shoulder blades to get lifted off the ground. One must work against this tendency for the stretch to be effective.
- Feel the stretch in the thighs, groin, arms, neck, stomach and back as you hold the pose. With each exhalation, relax deeper into the pose.
- After a few minutes, you may slowly turn the head back to the center, and straighten the torso and legs.
- Mirror the pose on the other side.
Benefits of Lying-down Body Twist (Chakrasana)
- Stretches the spine and quadriceps.
- Brings deep relaxation to the body and mind
- Helps in gas trouble
Contraindications of Lying-down Body Twist (Chakrasana)
Avoid this posture in case of spinal injuries.
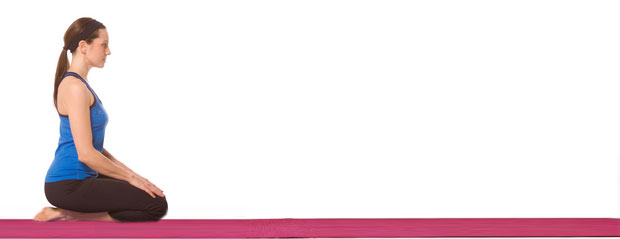
E. Vajrasana
Vajrasana – sit in vajrasana for 10-12 minutes after your meals daily, this pose is very helpful in eliminating the gas problem.
Steps to follow (Vajrasana) :
- With knees, ankles and big toes touching the ground, take a kneeling position.
- One should sit on the heels and place palms on the knees.
- The Spine should be erect and breath should be deep.
- Draw the abdominal region inside and expand the chest.
Other Benefits:
- Those suffering from blood pressure will benefit from this asana.
- It gives longevity and strengthens the spine.

F. Uttanpadasan
- Step 1:Lie on the back with legs together and palms facing downward. Extend your toes.
- Step 2:Slowly by inhaling lift the right leg up to 30 degrees, then 60 degree and maintain the position for 10 to 15 seconds with normal breathing. Use the palms as brakes
- Step 3:Repeat the practice from the other leg for the same length of time. After completion of this practice, try to lift both the legs together and maintain the final position
Therapeutic effects: Arthritis, Digestive Disorder
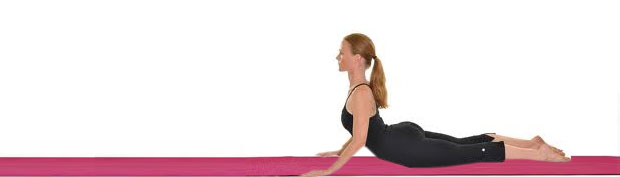
G. Bhujangasana (Cobra pose)
How to do Cobra Pose (Bhujangasana)
- Lie on your stomach with your toes flat on the floor and forehead resting on the ground.
- Keep your legs close together, with your feet and heels lightly touching each other.
- Place your hands (palms downwards) under your shoulders, keeping your elbows parallel and close to your torso.
- Taking a deep breath in, slowly lift your head, chest and abdomen while keeping your navel on the floor.
- Pull your torso back and off the floor with the support of your hands.
Checkpoint: Are you putting equal pressure on both the palms? - Keep breathing with awareness, as you curve your spine vertebra by vertebra. If possible, straighten your arms by arching your back as much as possible; tilt your head back and look up.
Checkpoint: Are your shoulders away from your ears? Keep your shoulders relaxed, even if it means bending your elbows. With regular practice, you will be able to deepen the stretch by straightening the elbows. - Ensure that your feet are still close together. Keep smiling and breathing. Smiling Cobras!
- Don’t overdo the stretch or overstrain yourself.
- Breathing out, gently bring your abdomen, chest and head back to the floor.
Benefits of Cobra Pose (Bhujangasana)
- Opens up the shoulders and neck.
- Tones the abdomen.
- Strengthens the entire back and shoulders.
- Improves flexibility of the upper and middle back.
- Expands the chest.
- Improves blood circulation.
- Reduces fatigue and stress.
- Useful for people with respiratory disorders such as asthma. (Do not practice this yoga pose during the attack though).
- Avoid practicing Bhujangasana if you are pregnant, have fractured ribs or wrists, or recently underwent abdominal surgeries, such as for hernia.
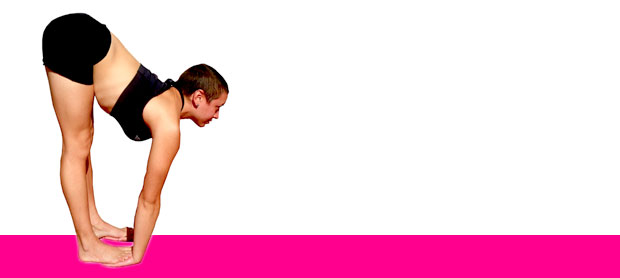
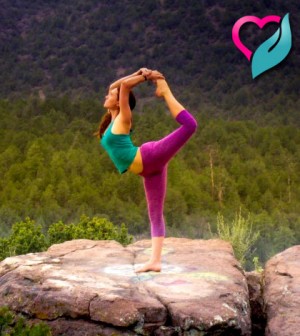
H. Padahastasana (Forehead to knee pose)
How to practice Standing Forward Bend (Hastapadasana)
- Stand straight with feet together and arms alongside the body.
- Balance your weight equally on both feet.
- Breathing in, extend your arms overhead. Breathing out, bend forward and down towards the feet.
- Stay in the posture for 20-30 seconds and continue to breathe deeply.
- Keep the legs and spine erect; hands rest either on the floor, beside the feet or on the legs.
- On the out breath, move the chest towards the knees; lift the hips and tailbone higher; press the heels down; let the head relax and move it gently towards the feet. Keep breathing deeply.
- Breathing in, stretch your arms forward and up, slowly come up to the standing position.
- breathing out, bring the arms to the sides.
Other Benefits of Standing Forward Bend (Hastapadasana)
- Stretches all the muscles of the back of the body.
- Invigorates the nervous system by increasing the -blood supply.
- Makes the spine supple.
- Tones the abdominal organs.
Contraindications and Cautions for Standing Forward Bend (Hastapadasana)
Back injury: People suffering from lower back injuries, Spondylitis, Cervical pain or any kind of back and spinal problems should not do this pose.
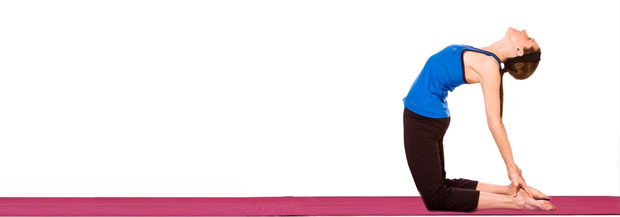
I.Ushtrasana (Camel pose)
How to perform the Camel Pose (Ushtrasana)
- Start this asana with sitting up on knees, heels of feet pressed against hips and calves of legs flat on the floor.
- Now reach backward, grasp left ankle with your left hand and right ankle with right hand.
- Breathe in through nostrils and lift your hips off the legs arching back and thrusting abdomen forward, try to tilt your head as far back as possible.
- Hold the posture till you can hold your breath or while holding the posture breath gently through nostrils.
- Now breathe out and return back to Position #1.
Other Benefits of the Camel Pose (Ushtrasana)
The ushtrasana helps in stretching spine, back muscles, shoulders and arms. Ushtrasana is considered best as a routine asana later when the muscles are limber and you have worked the back and shoulders.

J. Pranayama breathing technique for gas trouble
- Step 1: Sit or lie down on a comfortable place on the floor. Use a yoga mat for extra cushion. Wear loose clothing
- Step 2: Inhale through your nostrils and fill your belly with air. Expand your lower abdomen when inhaling to fill only the belly area. Exhale slowly through your nose and keep your breathing relaxed and slow. Repeat this breath several times.
- Step 3: Inhale through your nostrils, fill your belly with air and expand your rib cage to fill your mid-chest region in addition to your belly. Exhale slowly through your nose and keep your breathing relaxed and slow. Repeat this step several times.
- Step 4: Inhale through your nostrils, fill your belly with air, expand your rib to fill the mid-chest region with air and expand your upper chest or clavicle region to fill with air. You may raise your shoulders while expanding your upper chest. Exhale slowly through your nose and keep your breathing relaxed and slow. Repeat this step several times.
- Step 5: Repeat the earlier steps slowly until you are able to fill your belly, mid-chest and upper chest regions with air. Repeat this several times.
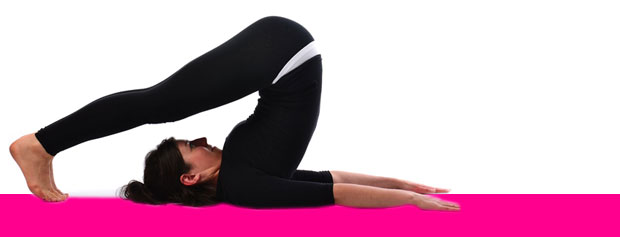
K. Plow Pose (Halasana)
How to do Plow Pose (Halasana)
- Lie on your back with your arms beside you, palms downwards.
- As you inhale, use your abdominal muscles to lift your feet off the floor, raising your legs vertically at a 90 degree angle.
- Continue to breathe normally and supporting your hips and back with your hands, lift them off the ground.
- Allow your legs to sweep in a 180 degree angle over your head till your toes touch the floor. Your back should be perpendicular to the floor. This may be difficult initially, but make an attempt for a few seconds.
Tip: Do this slowly and gently. Ensure that you do not strain your neck or push it into the ground. - Hold this pose and let your body relax more and more with each steady breath.
- After about a minute (a few seconds for beginners) of resting in this pose, you may gently bring your legs down on exhalation.
Tip: Avoid jerking your body, while bringing the legs down.
Benefits of Plow Pose (Halasana)
- Strengthens and opens up the neck, shoulders, abs and back muscles
- Calms the nervous system, reduces stress and fatigue
- Tones the legs
- Stimulates the thyroid gland, strengthens the immune system
- Helps women during menopause
Contraindications
- Avoid practicing Plow Pose (Halasana) if you have injured your neck, suffering from diarrhea and high blood pressure.
- Ladies should avoid practicing Plow Pose (Halasana) during pregnancy and during the first two days of the menstrual cycle.
- Consult a doctor before practicing Plow Pose (Halasana) if you have suffered from chronic diseases or spinal disorders in the recent past.
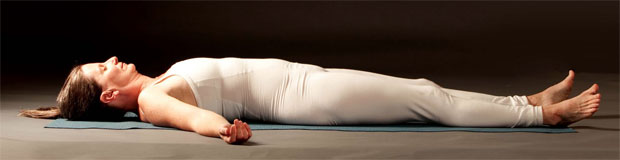
L. Corpse Pose (Savasana)
The finishing yoga poses should be included at the end of every yoga session or between every 30 minutes of yoga duration, to attain maximum benefits from the yoga poses that is just performed.
This finishing yoga is mean to relax your body after the yoga session. It normalizes the body and helps to reap maximum benefits from the yoga poses performed during the yoga session. It also provides a relaxing effect to the mind, body, and spirit. Let us see a few finishing poses:
How do you do savasana?
- Lie with your back, legs straight, and arms at your sides. Rest on your hands five inches apart from your body with palms facing upward. Rest on your feet drops open and closes our eyes.
- Let your breath occur naturally, when breath is free mind also free. When the breath is, allows moving naturally, the mind settles into itself.
- Allow your body and mind to feel heavy on the ground.
- From your feet soles to head-crown, consciously set free every body part, organ, and cell.
- Relax your face; make your eyes drop deep into their sockets. Welcome peace and silence into your mind, body, and soul.
- To exit savasana; first take a deep breath followed by gentle movement from toes to head (head be the last part) and awareness back to your body. Then, slowly roll to your right side and rested there for few seconds, inhale and comfortably move to seated position.

M. Sasankasana – The Hare Pose
How to do Sasankasana?
- Assume Vajrasana.
- The knees should be together on the ground.
- The body should be resting on the heels.
- The soles of the feet should be turned outwards.
- Inhale slowly and raise both your arms straight above your head.
- Turn the palms outward and ensure that the inside of the arms is touching the ears.
- Lean back as much as you can.
- Exhale and gradually bend the trunk and pelvis forward. While doing this the inside of the arms should keep touching the ears and you should remain seated at all times.
- Keep bringing your head and arms down until the arms touch the floor.
- Move the palms forward along the floor to the maximum limit.
- The palms should be together and abdomen should be pressing on the thighs.
- Hold your breath and maintain this posture as long as you comfortably can.
- Inhale and return to the starting posture in the reverse order, keeping the inside of the arms touching the ears and remaining seated
Benefits:
- Sasankasana helps get a toned abdomen.
- The upper back, shoulders and arms are stretched.
- The yoga pose can relieve spinal problems.
- Slipped disc can be cured with practice of this yoga pose.
- Knees and ankles attain strength.
- Drooping shoulders can be treated thereby correcting one’s posture.
Article by,
Dr Apsara VR
Ayurveda medical officer, Dhanvandharimadam, Trivandrum.
Email :apsaraayurveda@gmail.com
Image courtesy : alicenoyes.com , satyaliveyoga.com.au , yogatreesf.com , giglig.com , hellobollywood.com ,
blogspot.com , blogspot.com , satyaliveyoga.com ,yogamaze.com
blogspot.com , blogspot.com , satyaliveyoga.com ,yogamaze.com
 Posted in


0 comments:
Post a Comment